Disclosure: Some links in this article are affiliate links. We may earn a commission on qualifying purchases at no extra cost to you.
If you own a pellet grill and you haven't smoked a Boston butt yet, that's the first thing you should fix this weekend. Pulled pork is the most forgiving large cut on the roster — more fat, more connective tissue, more margin for error than brisket — and a well-executed Boston butt on a Traeger, Pit Boss, or recteq will produce results that genuinely rival anything you'd get at a competition. The searches driving people to this article — "traeger pulled pork," "pellet grill boston butt," "why is my pork tough" — all point to the same handful of real questions: what temp, when to wrap, how do I know when it's actually done, and why did last week's cook come out like rope. This guide answers all of them, with the actual science behind the stall, the honest take on fat-cap orientation and injection, and a step-by-step process you can hand to a first-timer and they'll nail it.
The process is not complicated. What makes pulled pork frustrating for people who've had one bad cook is usually a single mistake: pulling by the clock or by a single temperature number instead of by feel. Once you understand why probe-tender matters more than 203°F vs 205°F, and why the stall is just physics and not a problem, a 10-lb Boston butt becomes one of the most relaxing cooks you can run on a weekend.
This guide covers everything from selecting your butt at the butcher counter to reheating leftovers without drying them out — with the pellet-grill-specific quirks (Super Smoke timing, temp swings, smoke ring expectations) folded in throughout. It works on any pellet grill. Traeger owners get specific callouts where the brand's approach differs.
The cook is long. Make it a project. Have a beer.
What Makes a Great Pulled Pork?
Before the process, a quick note on what you're actually trying to achieve — because it shapes every decision downstream.
Pulled pork is not just slow-cooked pork. It's a specific texture: tender, moist strands and chunks that pull apart easily, hold some structure (not mush), carry a seasoned crust on the outside, and have enough residual fat and gelatin to stay juicy even when sauced. You get there by cooking collagen-rich meat low and slow until the connective tissue converts to gelatin — which self-bastes the meat from the inside as it cooks.
The Boston butt is perfect for this because it is loaded with exactly the right raw material: lots of intramuscular fat, a high density of collagen-rich muscle, and a bone (the scapula) that runs right through the center and conducts heat evenly. Get the process right and it's almost hard to ruin. Get a few things wrong — pull too early, skip the rest, use wet pellets — and you'll get tough, dry, stringy pork that confuses people because the numbers looked right.
Boston Butt: Anatomy, Selection & What You're Buying
What It Actually Is
The Boston butt is the upper (dorsal) portion of the hog's front shoulder — not the rear, despite the name. Texas A&M Meat Science confirms the bone inside is the scapula (the blade bone). The full front shoulder splits into two sub-primals: the upper Boston butt, which is rectangular, well-marbled, usually skinless with a ½–1 inch fat cap, and the lower picnic shoulder, which is triangular, leaner, and usually skin-on. "Butt" comes from Colonial-era New England barrels ("butts") used to ship the cut — nothing anatomical.
Per AmazingRibs (Goldwyn/Blonder): a pork shoulder is approximately 65% water, 15% fat, 8% protein, and 2% sugars and minerals. About one-fourth of the protein — roughly 2% of the total meat weight — is collagen. That collagen is the whole game. Low-and-slow cooking converts it to gelatin, which lubricates the muscle fibers from within and makes the meat shreddable even when pushed past 200°F.
Bone-In vs Boneless
Buy bone-in when you have the choice. The consensus across competitive cooks and serious practitioners (Malcom Reed, recteq community, Smoking-Meat.com) is that bone-in butts cook more evenly, retain more moisture, and give you a classic doneness cue: when the blade bone pulls cleanly out of the meat with no resistance, you're there. Boneless cooks slightly faster and is easier to inject and season throughout, but can cook less evenly, often comes netted (which makes for an uneven shape), and loses that tactile doneness indicator.
Size and Timeline Expectations
| Butt Weight | Cook Time at 225°F (estimate) | Cook Time at 250°F (estimate) |
|---|---|---|
| 6–7 lb | 9–12 hours | 7–10 hours |
| 8–9 lb | 12–14 hours | 9–12 hours |
| 10–12 lb | 14–18 hours | 11–14 hours |
These are estimates only. The 1.5–2 hours per pound guideline is a starting point for planning, not a finish line. Two butts the same weight from the same store can easily vary by two hours. Weather, individual animal fat distribution, and how your specific grill runs all move the needle. Plan around the high end; the faux Cambro hold (covered below) makes it easy to finish early and hold.
What to Look For at the Counter
Competition cooks (Malcom Reed, HowToBBQRight) look for a large "money muscle" — the cylindrical muscle on the end farthest from the bone — and a substantial "horn muscle" under the Y of the blade bone. Both are tender, take smoke well, and pull cleanly. Buy fresh over frozen where possible; frozen butts often have more moisture loss during the thaw and cook less predictably.
What You'll Need
Equipment
- Pellet grill with a reliable leave-in temperature probe port
- Instant-read thermometer — Thermapen ONE is the gold standard (±0.5°F, 1-second read), or ThermoPro TP19H for a budget option
- Leave-in wireless probe — MEATER Plus integrates natively with Traeger WiFIRE
- Half-size aluminum foil pans — Stock Your Home 30-pack
- Meat claws/bear claws — Bear Paws (original, USA-made)
- Large cooler (for the faux Cambro rest)
Wrapping supplies (pick one)
- Bryco Goods Pink Butcher Paper 18"×175' with dispenser — recommended
- Reynolds Wrap Heavy Duty Foil 18"
Optional: Injection
Before You Start — Prep, Rub & Injection Reality
Trimming the Fat Cap
Trim the fat cap to about ¼ inch. Remove any hard white fat deposits — they won't render at smoking temperatures and just block seasoning from reaching the meat. Don't obsess over the fat-cap orientation debate (fat up vs fat down): per Smoking-Meat.com, rendered fat runs off the surface — it does not soak back in to baste the interior. Interior juiciness comes from intramuscular fat and collagen breakdown, not from surface rendering. Most cooks put the fat cap down so any sticking is fat, not meat. Others aggressively trim it entirely to maximize bark coverage. Both approaches work fine.
Binder
Yellow mustard is the most common binder (Pit Boss, Meat Church, and recteq all use mustard or a mustard/molasses mix). You will not taste it in the finished pork. Its only job is giving the rub something to grip. Olive oil and hot sauce work identically. Binder is optional; if your rub is going on a tacky, slightly moist surface, it'll adhere fine without it.
Choosing and Applying Your Rub
A good pulled-pork rub balances four things: salt (seasoning and bark formation), sugar (bark color and caramelization — brown sugar is standard), paprika (color), and aromatics (garlic, onion, black pepper). The commercial options that hold up:
| Rub | Size | Price | Buy |
|---|---|---|---|
| Meat Church Holy Gospel | 12.5 oz | Check price | Amazon |
| Killer Hogs The BBQ Rub | 11 oz | Check price | Amazon |
| Bad Byron's Butt Rub | 26 oz | Check price | Amazon |
| Traeger Pork & Poultry Rub | standard | Check price | Amazon |
| Heath Riles Garlic Jalapeño | 16 oz | Check price | Amazon |
Apply your rub generously — you want a visible, even coat on all surfaces. Then rest it: minimum 30 minutes at room temperature while you heat up the grill, or refrigerate uncovered overnight. Only salt meaningfully penetrates the meat; everything else is surface flavor and bark chemistry.
Should You Inject?
Honest answer: probably not, for a backyard cook.
Injection makes more sense in competition, where every edge matters and judges expect extreme moisture. The common formula (apple juice + water + brown sugar + salt, sometimes with phosphates) adds interior flavor that surface rub can never reach. But per Mad Backyard, it adds water weight and can extend your cook by an hour or more. For a cut that is already 15% fat and built to self-baste, the marginal benefit in the backyard is real but small. If you want to try it, the Ofargo injector is well-built and easy to clean. If you'd rather skip one variable on a first cook, skip it.
Step 1 — Set Up Your Pellet Grill
Temperature Choice
Three proven approaches:
225°F — Classic low-and-slow. Maximum smoke exposure and bark development; longest cook. Traeger's flagship pulled-pork recipe uses 225°F. This is the most forgiving path for a first cook — the long time window makes it harder to overshoot.
250°F — The balance point. Many experienced pitmasters and the AmazingRibs team (citing Blonder's work on moisture retention) prefer 250°F. Higher temperatures actually retain more moisture in the meat by driving through the stall faster — counterintuitive but documented. Good bark, meaningfully shorter cook.
275°F — Hot-and-fast. Used by Traeger's "Meat Church method" and Pit Boss's own recipe. Roughly 1 hour per pound. Less smoke exposure, but excellent results when you wrap early. Good option if you need to time the cook more tightly.
Traeger: Super Smoke Mode
If your Traeger has Super Smoke (Woodridge Pro and above, all Ironwood and Timberline models), use it for the first hour or two — or until you wrap. Super Smoke maximizes smoke output by forcing the pellets to smolder at lower temperatures rather than burn cleanly. It operates only at lower temps (≤225°F range) and shuts off automatically when you raise to 250°F+. Use it while the butt is cold and moist — that's when the surface absorbs the most smoke.
Pellet Selection
For pulled pork, you want a wood that complements the pork's richness rather than fighting it.
| Pellet | Flavor Profile | Buy |
|---|---|---|
| Traeger Hickory 20 lb | Bold, rich, classic BBQ | Amazon |
| Traeger Apple 20 lb | Mild, sweet, fruity — Traeger's own recommendation | Amazon |
| Bear Mountain Gourmet Blend 20 lb | Hickory/apple/cherry mix, balanced | Amazon |
| Pit Boss Competition Blend 20 lb | Maple/hickory/cherry, versatile | Amazon |
Traeger recommends apple pellets for pulled pork — mild and sweet, hard to overdo. The practitioner shorthand is useful here: hickory and oak are your salt and pepper; cherry and apple are your garlic and onion. A hickory-plus-fruitwood blend (or loading mostly apple with a small amount of hickory) gives you the classic BBQ depth without the "hammy" heaviness that straight hickory can produce on a long pork cook.
Mesquite: avoid as a primary for pulled pork. It's earthy and aggressive; a 14-hour cook in mesquite smoke will overpower the meat. Use only as a minor accent if at all.
A Note on Smoke Rings
You will get a smoke ring on your pellet-grill pulled pork — possibly a better one than you'd expect. The smoke ring forms from a reaction between nitric oxide/carbon monoxide and myoglobin in the meat, and pellet grills produce significant nitric oxide as a combustion byproduct (AmazingRibs/Blonder data, confirmed by HowToBBQRight). The ring stops growing around 170°F when myoglobin denatures — not at 140°F as some guides claim. Don't mistake a thin ring for a failed cook; it's cosmetic, not a flavor indicator.
Step 2 — The Smoke Phase (Unwrapped)
Once your grill is up to temperature and stable, place the butt fat-side down on the grates. Insert your leave-in probe into the thickest part of the meat, centered, avoiding the bone (bone conducts heat differently and will read falsely high). Close the lid and leave it alone.
The first 3 hours are when the cold, moist surface absorbs the most smoke. Keep the lid closed. This is not the time for frequent checks.
Spritzing
Optional, but it does something. Spritzing every hour after the bark starts setting — usually after the third or fourth hour — with apple juice and/or cider vinegar aids smoke adhesion and helps develop a deeper mahogany color on the bark. Per AmazingRibs' "Mythbusting: Basting, Mopping, and Spritzing," spritzing adds roughly 10–20% to total cook time (approximately 1–2 additional hours). If you're running a tight schedule, skip it. If you have the time and want maximum bark development, do it.
Don't open the lid more often than once per hour. Every lid-open drops chamber temperature and costs you recovery time.
What to Watch For
You're cooking unwrapped until two things are true simultaneously: the bark is set (dark, dry, mahogany-colored surface that doesn't smear when you touch it) and the internal temp is in the 160–175°F range. This typically takes 5–6 hours for an average 8-lb butt at 225°F, but don't use the clock — use your eyes and the probe.
Expect your pellet grill to swing ±10–15°F as the controller cycles. That's normal and won't affect your cook.
Step 3 — The Stall: What It Is and What to Do About It
At some point — usually when the internal temp is between 150°F and 165°F — the temperature will stop rising. It might sit there for an hour. It might sit there for three hours. This is the stall, and it causes more anxiety in new pitmasters than anything else in BBQ.
The Science (This Is the Part Most Guides Get Wrong)
The stall is caused by evaporative cooling. The meat is sweating — moisture evaporating from the surface cools it at exactly the rate the cooker is adding heat. Per AmazingRibs science advisor Prof. Greg Blonder (confirming Nathan Myhrvold's original work): "The meat is sweating, and the moisture evaporates and cools the meat just like sweat cools you after cutting the lawn on a hot day."
It is not caused by collagen melting. Blonder's energy calculation showed there isn't nearly enough collagen in a Boston butt to absorb all the heat necessary to hold the temperature flat. The proof: a foil-wrapped butt shows no stall, even though collagen still converts to gelatin inside the foil. The collagen-conversion window (160–205°F) overlaps with the stall temperature range by coincidence — not causation.
What to Do
You have three options:
-
Wait it out. Patience is a valid strategy, especially at 250°F where the stall is shorter than at 225°F. Have another beer.
-
Wrap it (the Texas Crutch). Wrapping in foil or butcher paper seals in the moisture that would otherwise evaporate, breaking the evaporative cooling loop and pushing the temperature back up. This is the most common approach. Wrap when bark is set and you've hit the stall (~160–165°F internal).
-
Raise the cooker to ~300°F. Not ideal for bark development but gets you through the stall faster if you're time-constrained.
Step 4 — Wrapping: Foil vs Butcher Paper
Wrap when bark is set — roughly 160–165°F internal. Don't wrap earlier just because you're nervous about the stall; undercooked bark will smear inside the wrap and you'll lose it.
Foil (Texas Crutch)
The classic method. Foil seals completely, stops the evaporation, and pushes you through the stall as fast as possible. Many cooks add liquid to the foil — apple juice, cider, butter, hot sauce, brown sugar — before sealing. This produces an extremely moist, tender result. The tradeoff: the steam inside the foil will soften the bark. If a crunchy, dry bark is your priority, foil is not your best option.
Reynolds Heavy Duty Foil 18" — use the wide roll. You want the butt fully enclosed with no gaps.
Butcher Paper
Pink/peach butcher paper breathes slightly, so it preserves more bark texture than foil while still protecting moisture and helping push through the stall. It's the choice of most competition cooks and backyard pitmasters who want both bark and moisture. The tradeoff: slightly slower through the stall than foil, and it won't retain liquid additions as well.
Bryco Goods Pink Butcher Paper 18"×175' — the 18-inch width handles even large butts comfortably.
The Third Option
You can skip wrapping entirely. AmazingRibs notes the crutch isn't strictly necessary for a fatty cut like Boston butt; an unwrapped butt will eventually get through the stall on its own and produce excellent bark. The cost is time — expect the cook to run 1–2 hours longer. If you started early enough and have the headroom, this is a legitimate choice.
Keep your probe tip exposed through whatever wrap you use.
Step 5 — The Final Push: Probe-Tender Doneness
After wrapping, temperatures rise more predictably. You're targeting roughly 200–205°F internal, but more importantly, you're targeting probe-tender.
What Probe-Tender Actually Means
Probe-tender means a thermometer probe, a skewer, or even a toothpick slides into the thickest part of the meat with no resistance — like pushing into room-temperature butter. Per AmazingRibs (Goldwyn): "The meat is at its maximum tenderness and juiciness when it hits 203°F." Traeger's recipe targets 204°F and specifically warns: "At 190°F, the collagen has not fully broken down, which means the meat can still be tight and chewy."
The "203 vs 205" debate is real, but functionally meaningless. Different animals hit probe-tender at slightly different temperatures — anywhere from 195°F to 207°F is within normal range. Temperature is the indicator; tenderness is the confirmation. This is why "pull at exactly 195°F" produces tough pork so often — some butts simply aren't probe-tender at 195°F yet, and they need another 30–45 minutes.
Visual Doneness Cues
In addition to probe feel and temperature:
- Deep mahogany bark with some surface cracking
- Fat cap split and starting to separate at the edges
- Bone wiggles or pulls cleanly out with no resistance
- Meat has pulled slightly away from the bone (the "bone reveal")
Below roughly 195°F: the meat will slice but won't shred easily. Past roughly 205°F: you risk the gelatin liquid evaporating and the meat drying out. The window is forgiving, but it has edges.
Step 6 — The Rest: Don't Skip This
The rest is not optional, and it's the step most first-time cooks skip because they're hungry and the butt smells incredible.
Why It Matters
When you pull the butt off the smoker at 200–205°F, the gelatin inside is fully liquid. If you pull and shred immediately, that liquid runs straight out onto your cutting board and you get dry pork. Resting lets the gelatin cool and re-set — gelatinize — so it stays bound up in the meat fibers when you pull. The difference is significant and immediate.
Per Barbecue FAQ: resting is how you preserve the internal moisture that low-and-slow cooking spent 10+ hours developing.
How Long to Rest
- Minimum: 30 minutes if you're truly in a time crunch. Better than nothing.
- Optimal: 1–2 hours. Going from ~200°F to ~150–160°F naturally takes about 1–2 hours unwrapped.
- Faux Cambro (extended hold): Pre-heat a large cooler by filling it with hot water for 30 minutes, drain, then place the wrapped butt inside and fill the remaining space with towels. This setup holds the butt safely for 6–12 hours. Practitioners on the AmazingRibs Pitmaster Club regularly hold butts this way and report them arriving at pulls warm, juicy, and fully intact. The only rule: keep the meat above 140°F for food safety.
The faux Cambro is the secret weapon for timing pulled pork to a party. Finish early, hold until you're ready, pull just before serving.
Foil vs paper for resting: Foil holds heat better and keeps the butt hottest and juiciest but continues steaming the bark. If you wrapped in paper, keep it in the paper for the rest. Either way, don't open the wrap until you're ready to pull.
Step 7 — Pulling and Serving
The Pull
Once rested, open the wrap (save the accumulated juices — they're gold), let the butt sit 5–10 minutes until cool enough to handle safely, then pull.
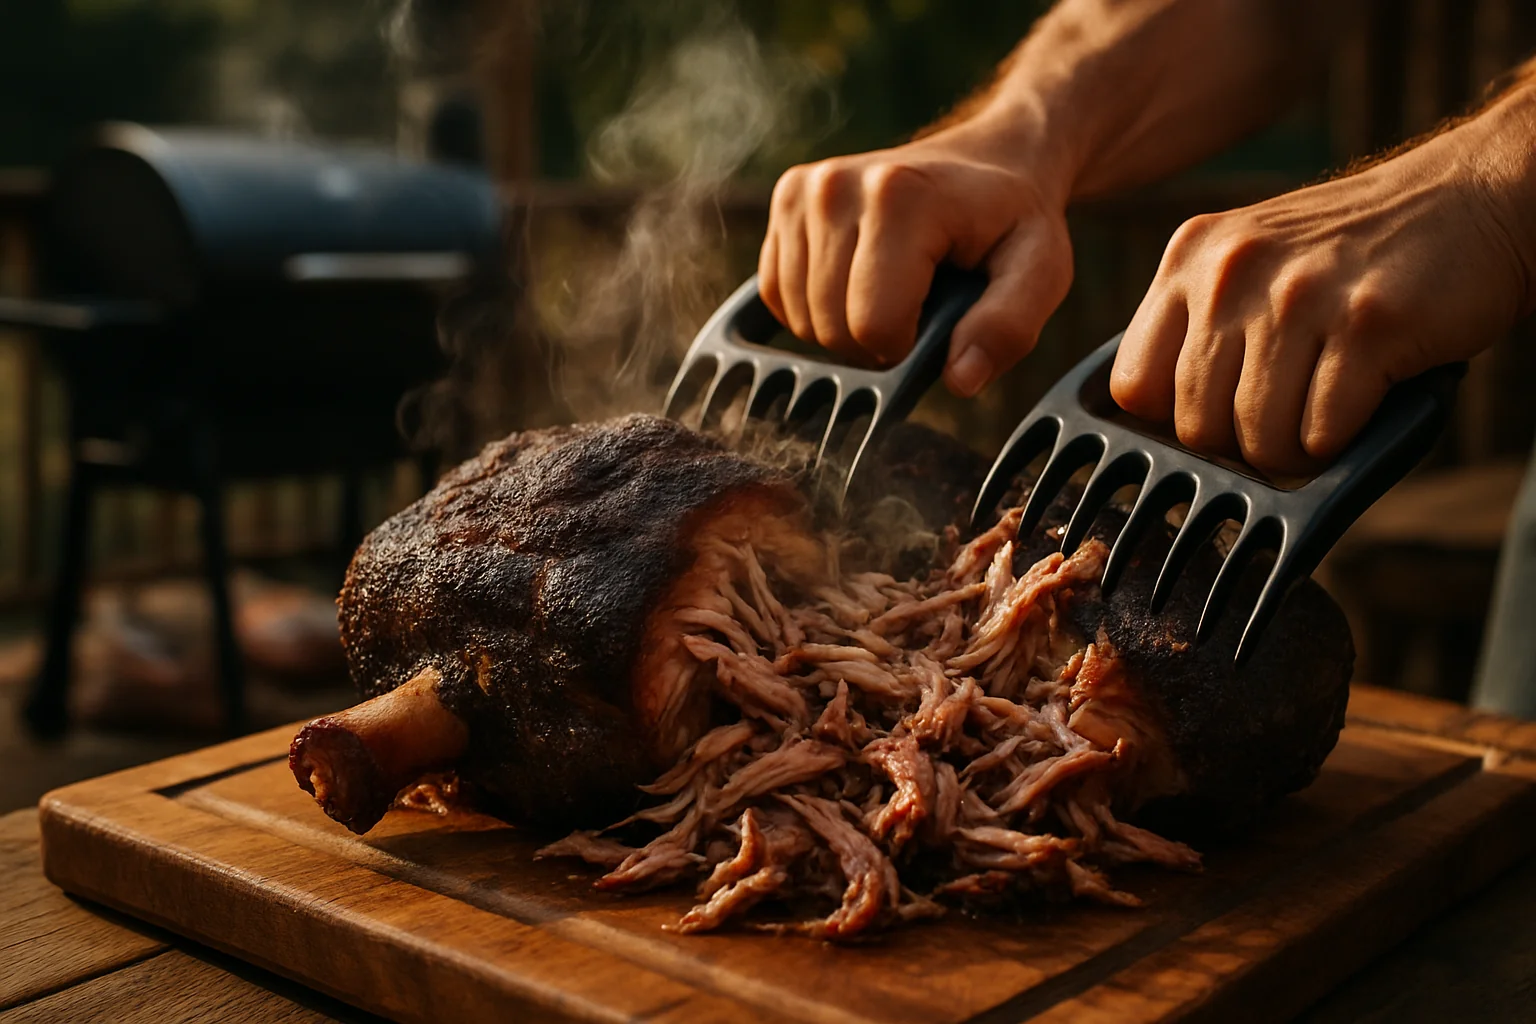
Tools: Bear claws or the equivalent are easiest for high volume — you can break down a 10-lb butt in 3 minutes with two sets of claws. Two forks work fine. Some cooks use bare hands in food-safe heat gloves, which gives the best tactile feedback for separating good meat from fat and connective tissue.
Pull along the grain into chunks and medium-length strands — not into tiny shredded strings, not into huge chunks. Discard any large unrendered fat deposits and the blade bone. If you find pockets that aren't tender, they can go back on the grill unwrapped at 250°F for another 30–45 minutes.
Finishing
Toss the pulled meat lightly with the reserved pan juices (run them through a fat separator or skim the top; there will be a lot of fat). Add a light dusting of your rub over the top and fold it in. This keeps the bark flavor distributed throughout instead of concentrated on the exterior.
Add sauce to taste, or serve sauce on the side — which is the better move if you have guests with different preferences.
Regional Sauces
| Style | Profile | Best With |
|---|---|---|
| Eastern Carolina vinegar | Thin, tangy, apple cider vinegar + red pepper flakes | Traditional pulled pork, cuts the fat |
| South Carolina "Carolina Gold" | Mustard-based, tangy-sweet | Rich rubs with a lot of paprika |
| Kansas City tomato | Thick, sweet, tomato/molasses | Crowd-pleasing, works on sandwiches |
The vinegar sauce is the traditional pairing — it cuts through the richness of the pork in a way that thick tomato sauce doesn't. Offer both if you're cooking for a crowd.
Serving
Classic formats:
- Sandwiches on soft potato or brioche buns with coleslaw and pickles
- Plates with baked beans, mac and cheese, cornbread, and slaw
- Tacos, sliders, nachos, burrito bowls
Common Mistakes to Avoid
Pulling by the clock. The 1.5–2 hours per pound estimate is a planning tool, not a recipe. Two butts the same size can finish two hours apart. Cook to probe-tender.
Pulling at a single temperature without a feel check. "It's at 200°F, done" — except it still has resistance. Use the probe-tender feel to confirm; temperature is your indicator, not your verdict.
Skipping the rest. Every time. The liquid gelatin runs out, the pork is dry, the cook is ruined. Even 45 minutes is meaningfully better than nothing.
Panicking at the stall. It's physics. Evaporative cooling. It will end. Wrap it or wait it out — but don't crank the temp to 400°F trying to push through it; you'll get uneven cooking and dried-out outer layers.
Using wet pellets. Moisture-swollen pellets cause auger jams, inconsistent temperature, and weak smoke output. Store pellets in a sealed container (or the original bag sealed tightly) away from humidity. In wet climates, empty your hopper between cooks. This single maintenance habit prevents more failed cooks than anything else.
Opening the lid too often. The first three hours are the highest-value smoke absorption window. Every lid-open costs 10–15 minutes of temperature recovery. Check once per hour at most until you're approaching wrap time.
Wrapping too early. If the bark isn't set when you wrap, the steam will dissolve it. You want the surface dry, dark, and firm before it goes into foil or paper.
Frequently Asked Questions
Q: What temperature should I pull my pork butt off the smoker?
Target 200–205°F internal and, more importantly, probe-tender — a thermometer probe should slide in with zero resistance, like room-temperature butter. The "203 vs 205" debate is real but practically irrelevant; different animals hit probe-tender at slightly different points in that range. Traeger warns that at 190°F the collagen hasn't fully broken down, leaving the meat tight and chewy. Trust the feel over the number.
Q: How long does it take to smoke a Boston butt on a pellet grill?
At 225°F, budget roughly 1.5–2 hours per pound as a planning estimate. An 8-lb butt typically takes 10–14 hours. At 250°F it runs faster; at 275°F closer to 1 hour per pound. These are estimates only — individual animals, grill models, and weather conditions all affect the timeline. Plan around the high end and use a faux Cambro hold to bridge any gap.
Q: What causes the stall and how do I get through it?
The stall (internal temp plateauing at ~150–165°F for hours) is caused by evaporative cooling — the meat is sweating and the moisture evaporating from the surface counteracts the heat from the cooker. It is not caused by collagen or fat rendering. To push through: wrap in foil or butcher paper at ~165°F when bark is set, add liquid if using foil, and seal tightly. The stall will break within 30–60 minutes of wrapping. Alternatively, wait it out — the stall ends on its own regardless.
Q: Foil or butcher paper — which should I use to wrap?
Foil is faster through the stall, retains maximum moisture, but softens the bark. Butcher paper breathes slightly, preserves more bark texture, and is the choice of most competition cooks who want both moisture and crust. For a first cook, foil is more forgiving. If bark texture is a priority, go paper. Both produce excellent pulled pork — it's a tradeoff, not a right-or-wrong choice.
Q: Do I need to rest pulled pork and for how long?
Yes, and you shouldn't skip it. Resting lets the liquefied gelatin re-set inside the meat fibers so it stays moist when you pull. Skip the rest and that gelatin liquid runs straight out onto the cutting board. Minimum 30 minutes; optimal 1–2 hours. A faux Cambro setup (pre-warmed cooler with towels) can safely hold a wrapped butt for up to 6–12 hours if you need to time your serve.
Q: Will I get a smoke ring on a pellet grill?
Yes — often a very good one. The smoke ring forms from a reaction between nitric oxide/carbon monoxide (combustion byproducts) and myoglobin in the meat. Pellet grills produce significant nitric oxide during combustion. The ring stops growing around 170°F when myoglobin denatures, not at 140°F as some guides state. The ring is cosmetic, not a flavor indicator, but if you want to maximize it, start cold meat in a cold grill and let the temp rise slowly in the early part of the cook.
Q: What are the best pellets for pulled pork?
Apple or a hickory/fruitwood blend. Traeger officially recommends apple pellets for pulled pork — mild, slightly sweet, hard to overdo. Hickory is classic but can turn "hammy" on a 12-hour pork cook if used alone. The standard pitmaster formula: mostly apple or cherry, with hickory as an accent (~25–30% of the mix). Competition blends from Lumber Jack, Pit Boss, or Bear Mountain that combine maple/hickory/cherry are reliable all-purpose options.
Conclusion
Pulled pork on a pellet grill is genuinely one of the most rewarding cooks you can run — not because it's technically demanding, but because the combination of low-and-slow heat and a collagen-rich cut is so forgiving that it's hard to catastrophically fail once you understand the process. The things that go wrong for most people are fixable by knowledge, not skill: pull by feel rather than by a single temperature, rest the meat long enough for the gelatin to re-set, use dry pellets, and don't panic when the temperature stalls for three hours at 160°F.
The single most useful habit to build: stop checking the clock and start using a good instant-read to test probe-tenderness at 195°F+. That one change is worth more than any equipment upgrade.
For more on the hardware side — what grill to buy, what features actually matter for long pork cooks — see our best pellet grills guide or the pellet grill buying guide if you're still deciding. For pellets, the complete wood pellet ranking covers every major brand. And if you want to understand how your specific Traeger model handles low-and-slow cooks, the Traeger Ironwood vs Woodridge comparison and Traeger Woodridge Pro review are both useful reads before a big cook.
Now go buy a butt.

